Route Guides
This guide walks you through using Custom Routes and Unified Routes in Javelin. It covers prerequisites, how to create secrets, use virtual keys (v-keys) for enhanced security, retrieve the Javelin API key, and inspect requests via Chronicles.
Prerequisites
1. Create a Provider
Before using any route, you must set up a provider.
Refer to the Provider Guide to get started.
2. Add Secrets and Create Virtual Keys
To securely store and manage your provider credentials, Javelin uses a Secrets system. These secrets can be injected into request headers or query parameters via virtual keys (v-keys), which enhance security by preventing direct exposure of actual provider keys.
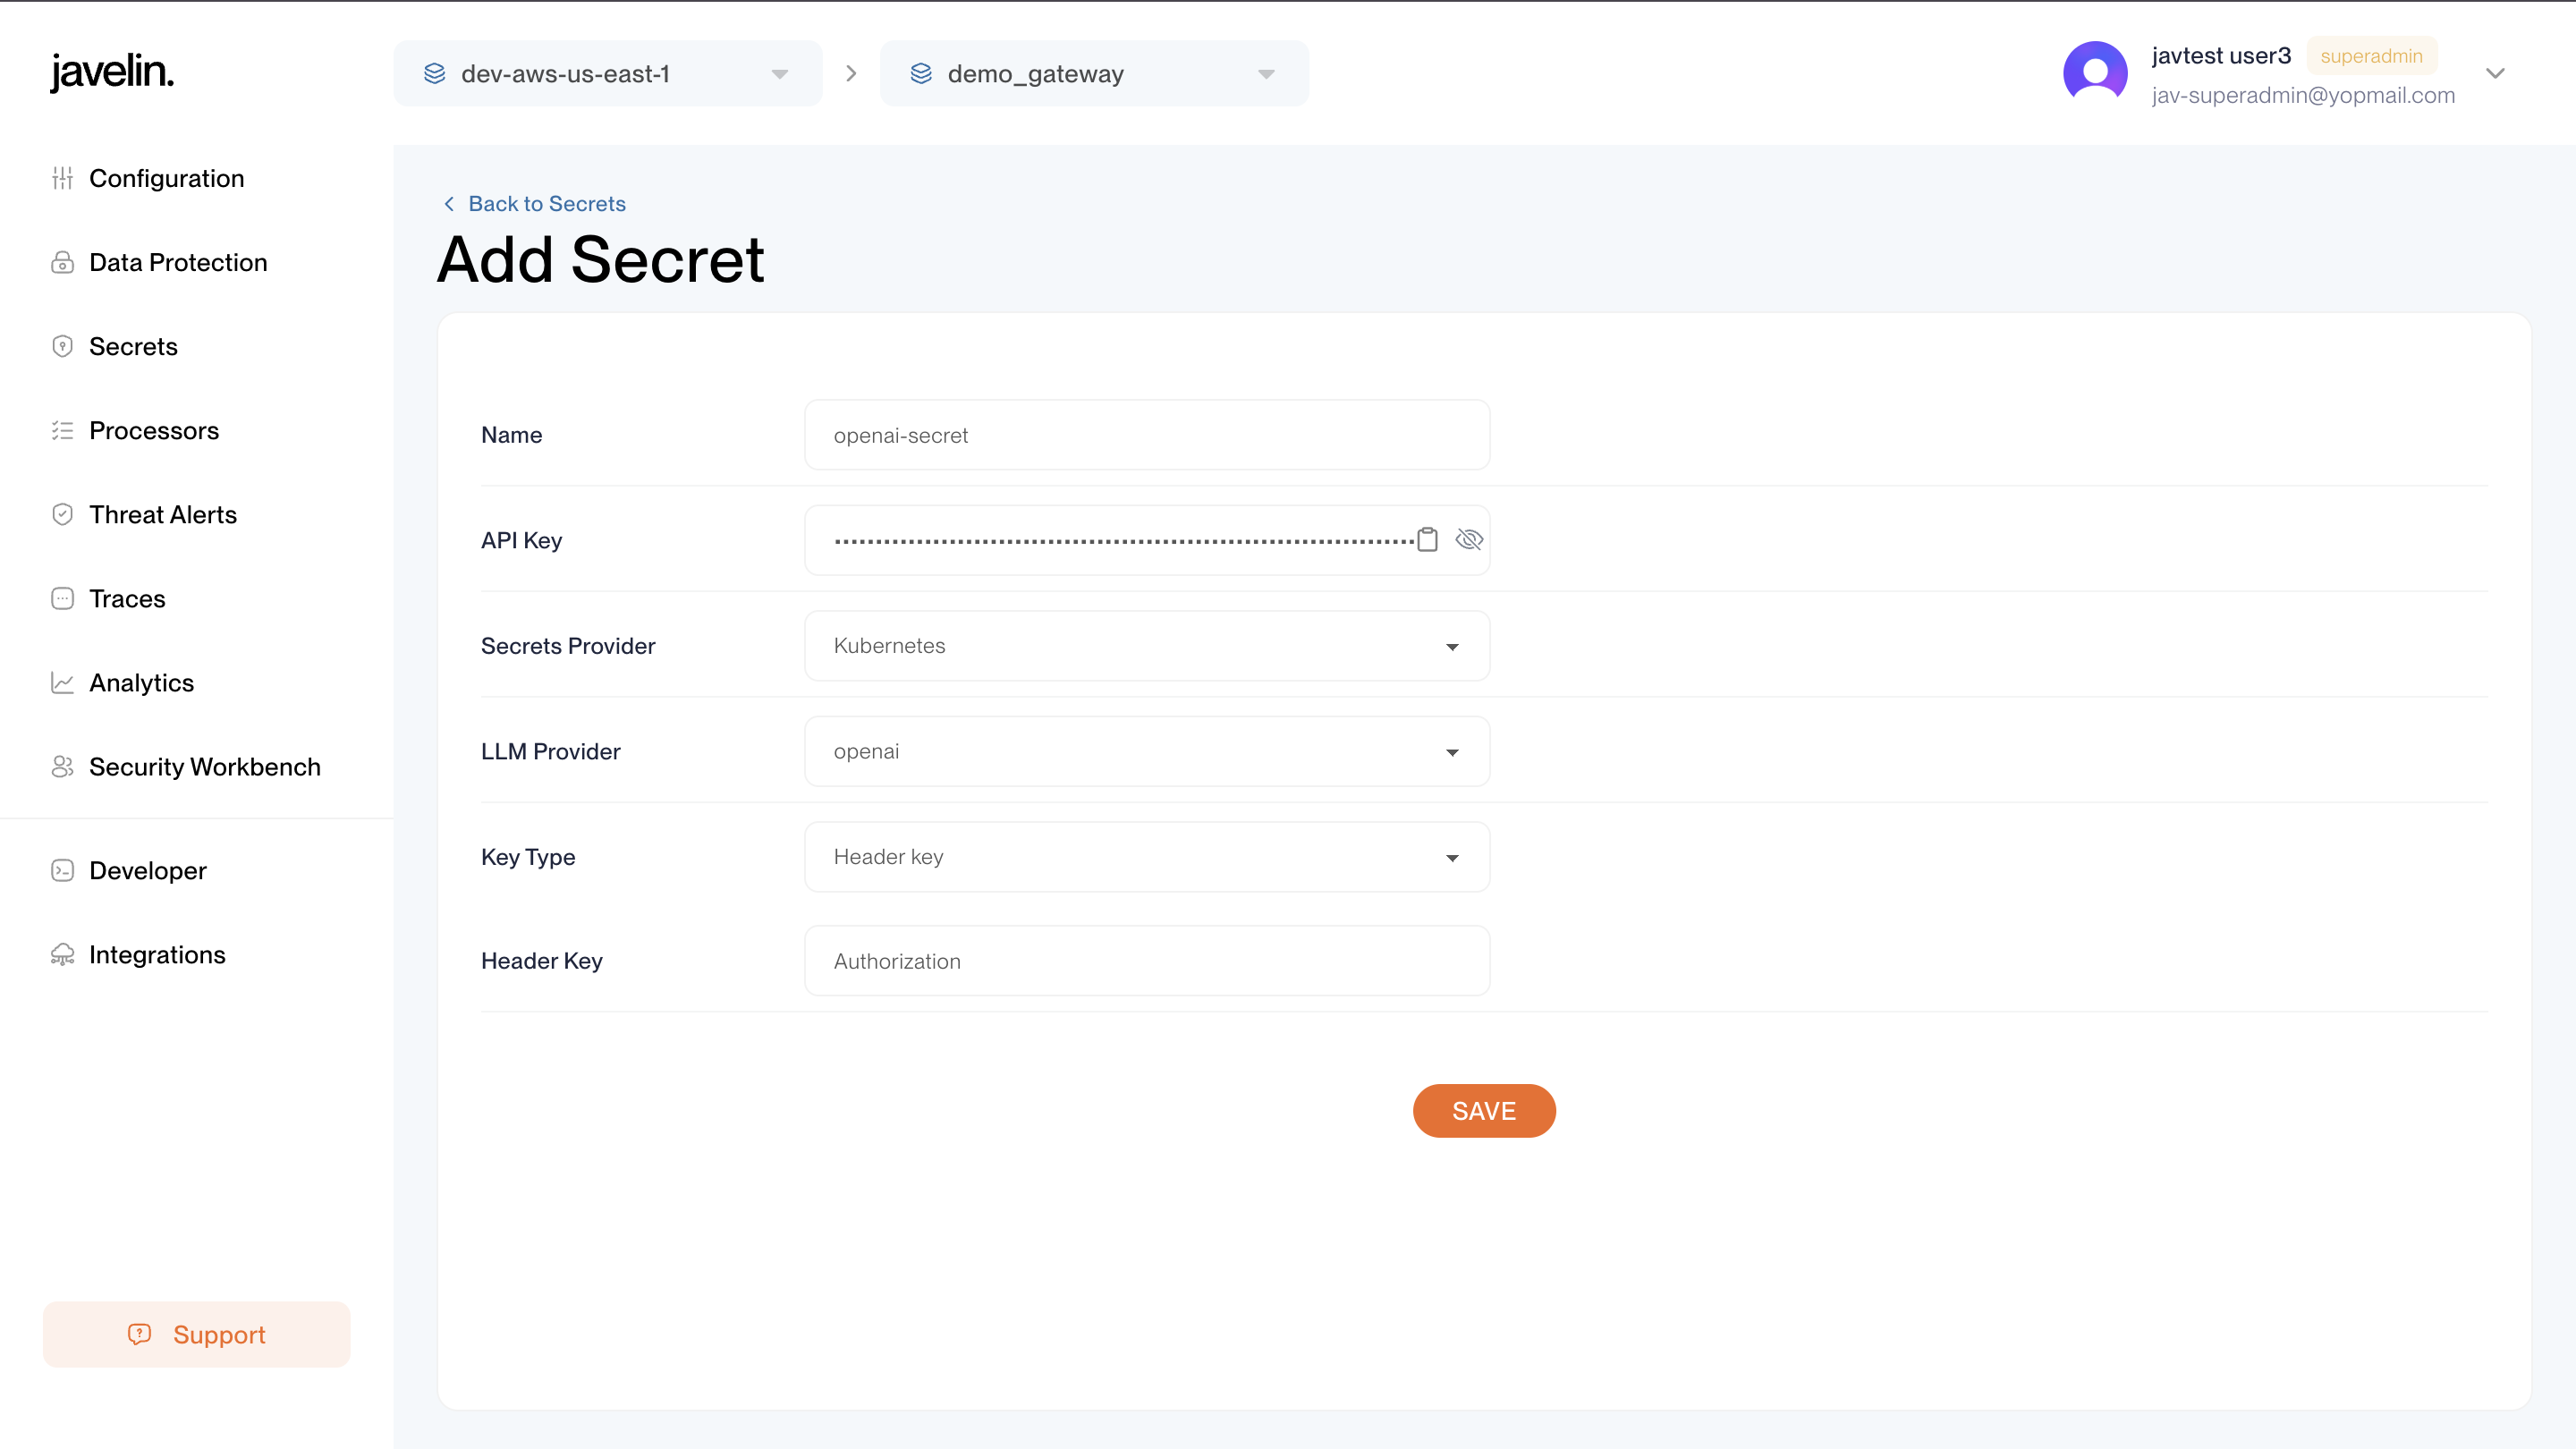
Creating a Secret
To create a secret:
- Go to a specific Gateway.
- From the sidebar, click Secrets.
- Click the Create Secret button.
- Fill in the required fields:
- Name: A label for the secret.
- Provider Secret Key: The actual key (e.g., OpenAI API key).
- Select Provider: Choose the corresponding provider.
- Injection Method: Choose whether the key should be injected via:
headersquery-params
- Click Save.
Copying the Virtual Key
After saving the secret:
- You'll see the Virtual Key (v-key) in the secrets list.
- Copy the Virtual Key using the copy button.
You can use this Virtual Key in header x-javelin-virtualapikey when requesting your custom routes or test playgrounds to refer to the provider key indirectly, adding an extra layer of security and abstraction.

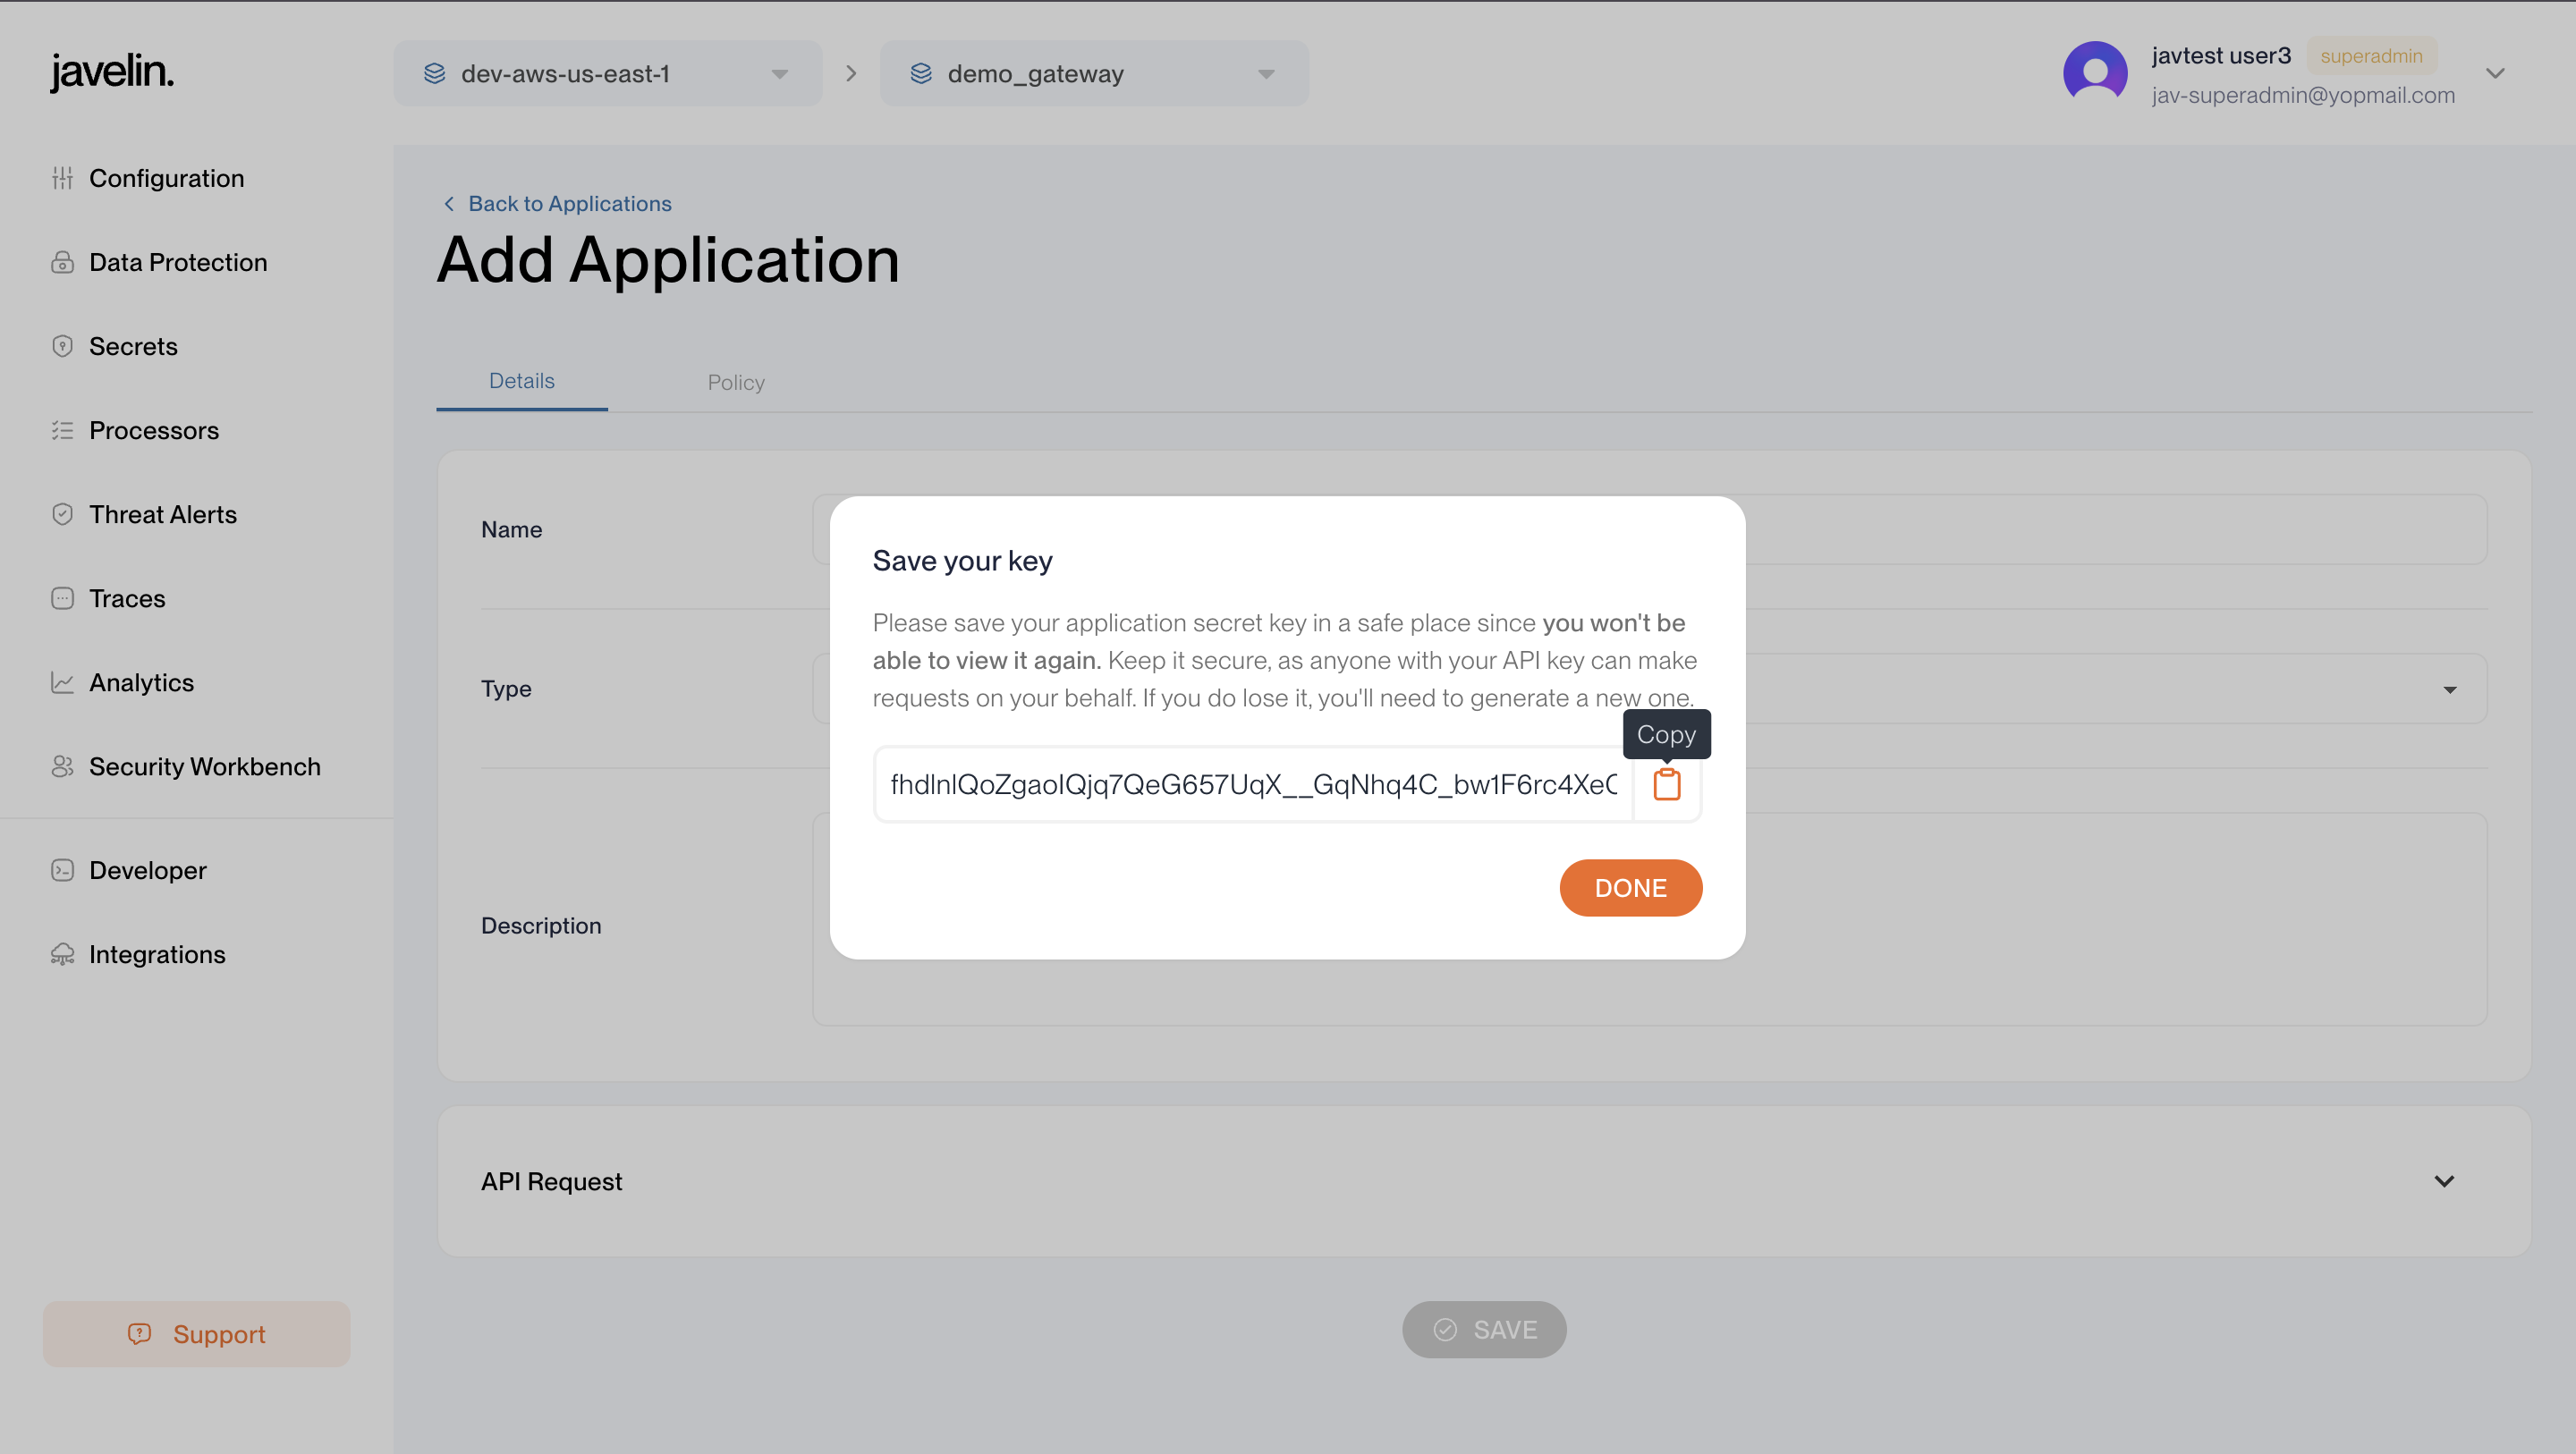
3. Get the Javelin API Key
To authenticate requests from your application:
- Navigate to a specific Gateway.
- In the Configuration screen, create a new Application.
- Once created, a modal opens — copy the Javelin API Key.
This key is required in request headers to:
- Authenticate the route call
- Associate usage with the correct application
- Enable monitoring in application chronicles
Using Unified Routes
Unified Routes are flexible, abstracted endpoints that can handle various model types (chat, completion, embedding) using a single route. They are ideal for simplified integrations and internal A/B testing.
When you create a provider, Javelin automatically provisions a Reserved unified route for that provider. These are system-managed and help you get started instantly without any manual setup.
How to Use Unified Route
- Go to the Unified Route tab for your provider.
- Copy the auto-generated
curlrequest. - Replace the following:
$OPENAI_API_KEY: Your actual provider key$JAVELIN_API_KEY: Your application’s Javelin API Key
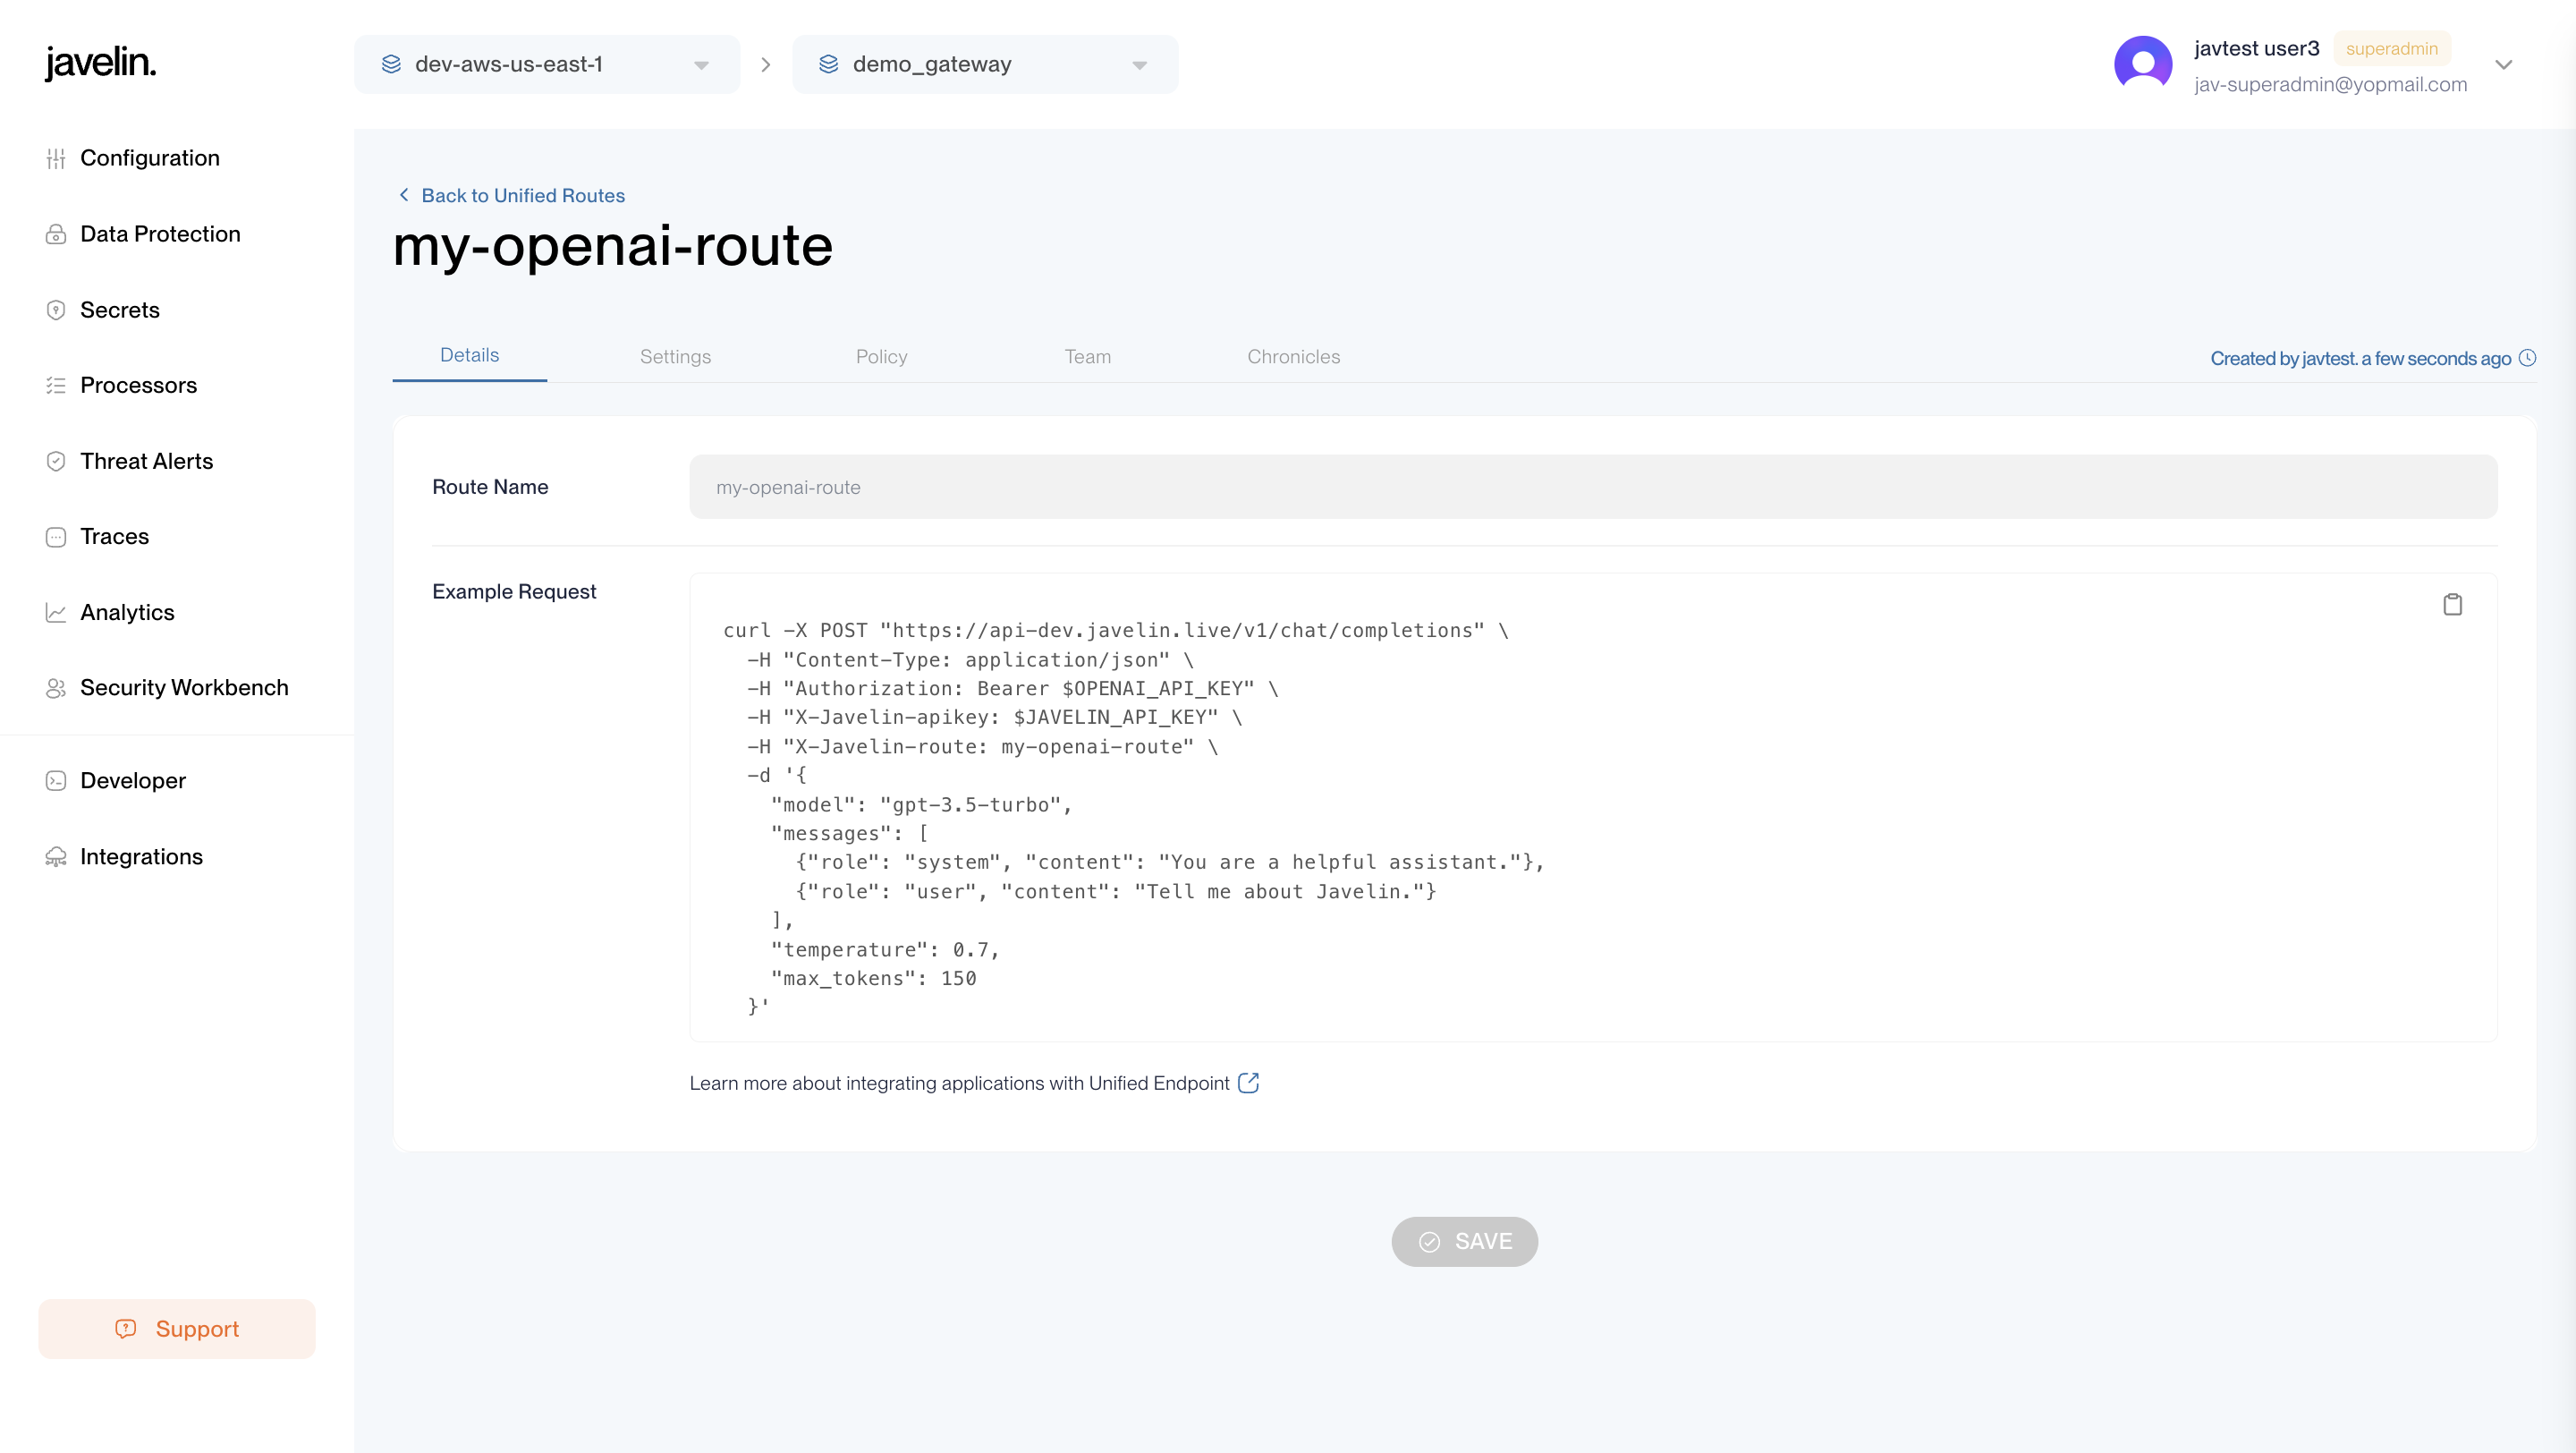
Sample Unified Route Request
curl -X POST "https://api-dev.javelin.live/v1/chat/completions" \
  -H "Content-Type: application/json" \
  -H "Authorization: Bearer $OPENAI_API_KEY" \
  -H "X-Javelin-Apikey: $JAVELIN_API_KEY" \
  -H "X-Javelin-route: my-openai-route" \
  -d '{
    "model": "gpt-3.5-turbo",
    "messages": [
      {"role": "system", "content": "You are a helpful assistant."},
      {"role": "user", "content": "Tell me about Javelin."}
    ],
    "temperature": 0.7,
    "max_tokens": 150
  }'
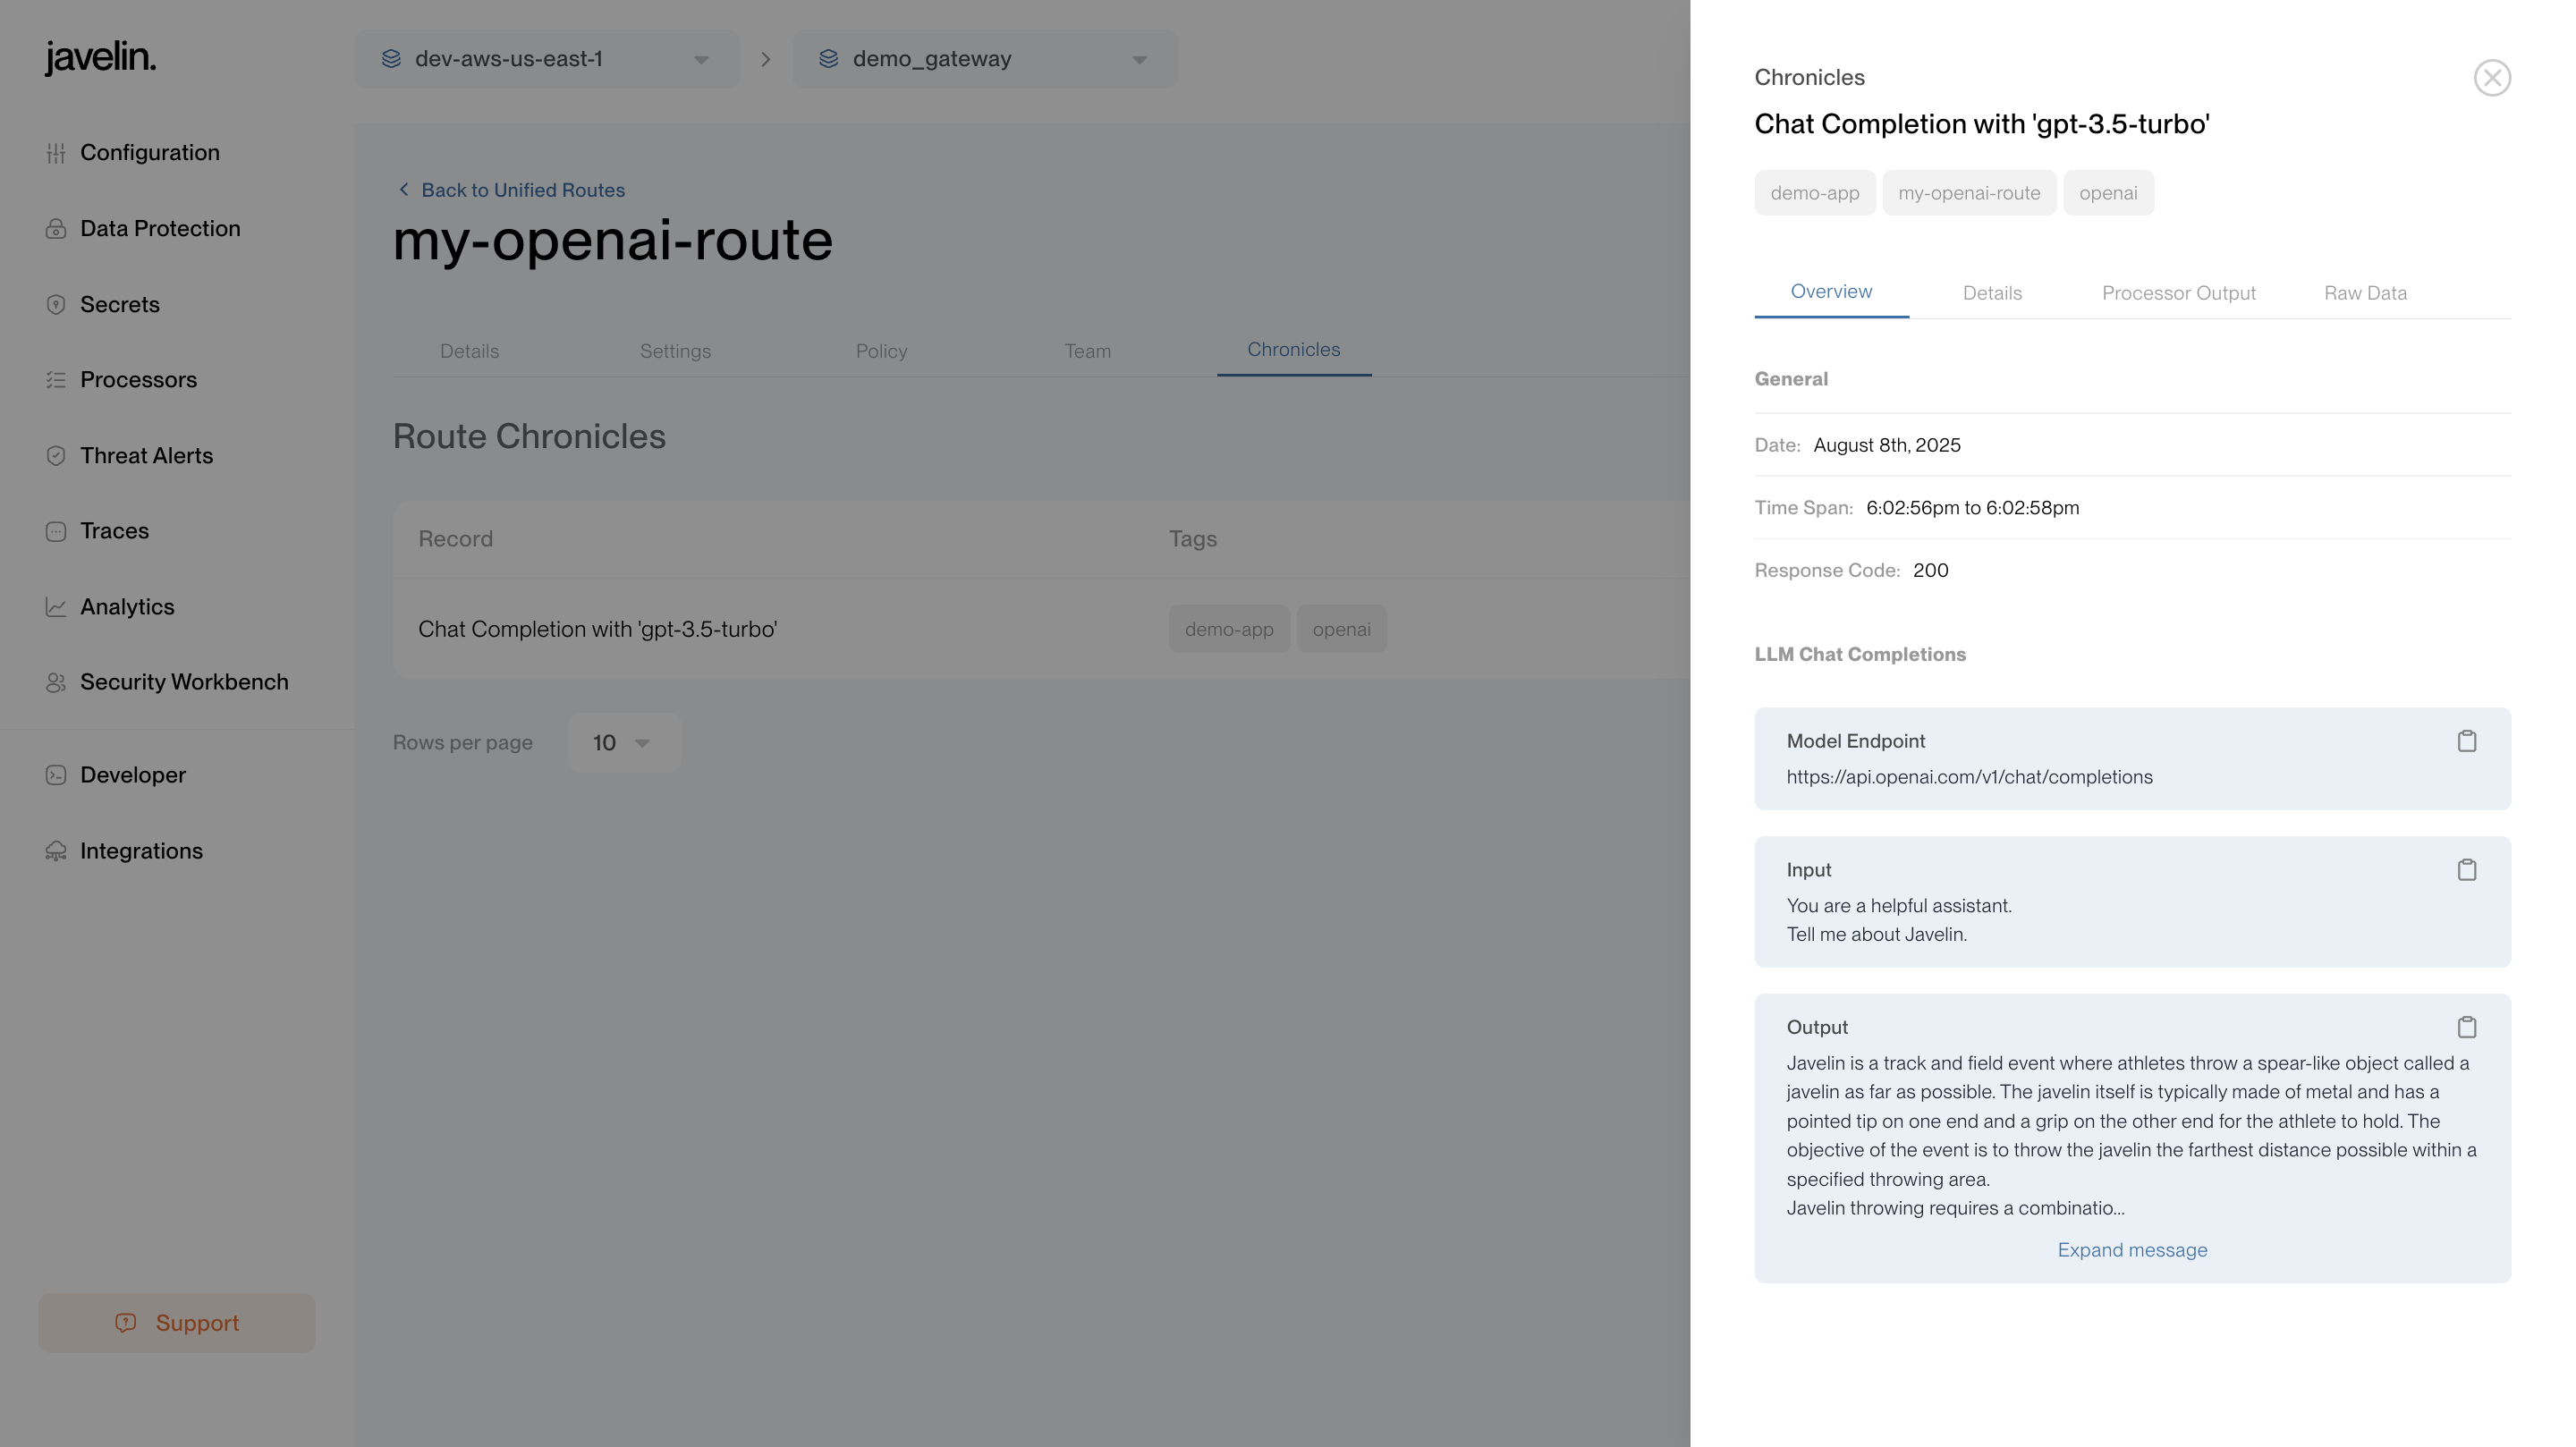
After sending the request, visit the Chronicles section to inspect:
- Request payload
- Provider response
- Model input/output
- Errors (if any)
- Guardrail triggers
- Raw JSON logs
Using Custom Routes
Custom Routes allow precise control over how models are configured and routed. These routes support custom model names, suffixes, and fallback logic tailored to your use case.
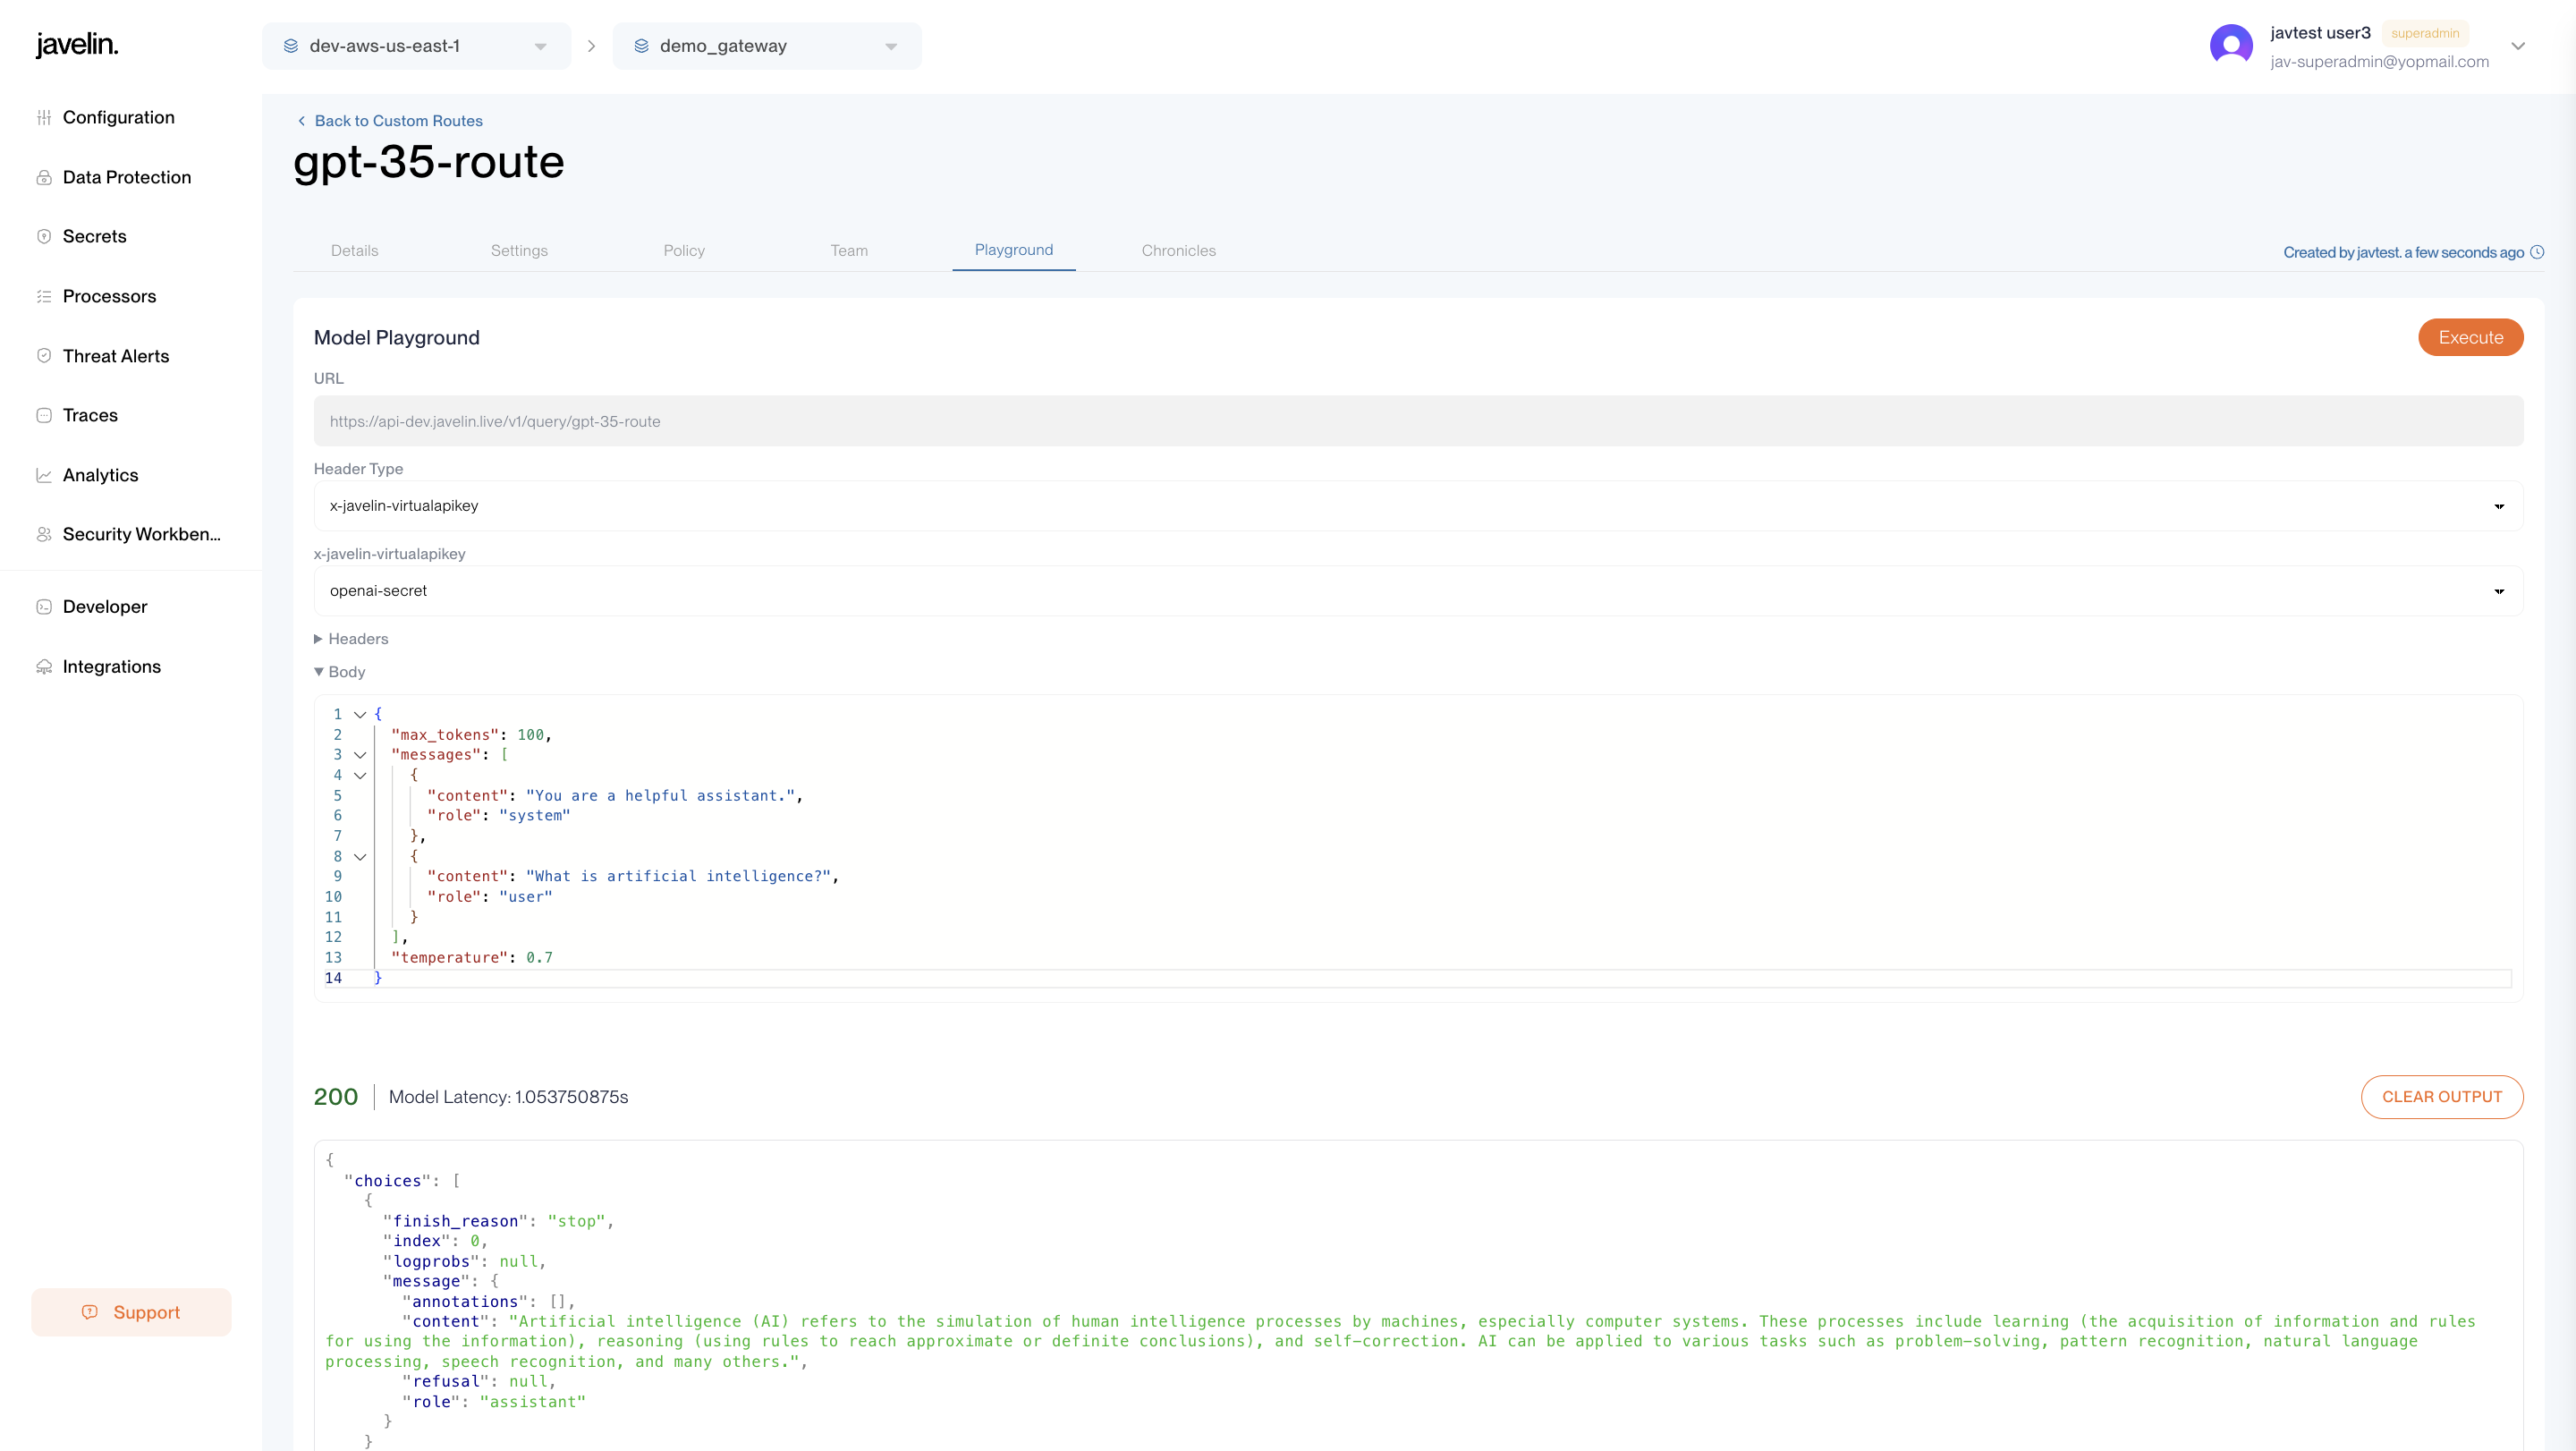
Testing in Playground
Each custom route has a Playground tab.
- Secrets are automatically selected based on the provider.
- No manual headers or keys needed in the UI.
- Click Execute to test.
- View results immediately below the form.
Using Fallback Model in Custom Routes
Javelin provides a built-in Fallback Model mechanism in Custom Routes. This ensures higher reliability by rerouting a request to a secondary model if the primary model fails with defined error codes.
On a Custom Route’s detail page, you’ll see a toggle labeled Enable Fallback Model. When enabled, three input fields appear:
- Fallback Conditions: A comma-separated list of HTTP status codes that trigger the fallback. Common values include
429(rate limit) and503(service unavailable). - Fallback Model Name: The name of the model you'd like to use as a fallback (e.g.,
gpt-4). - Fallback Model Suffix: The request path suffix used for the fallback model (e.g.,
/chat/completions).
When a request to the primary model results in one of the specified error codes, Javelin automatically forwards the same input to the fallback model.
YAML Configuration Example
models:
  - name: gpt-3.5-turbo
    provider: openai
    suffix: /chat/completions
    virtual_secret_key: ""
    fallback_enabled: true  # fallback toggle enabled for this model
    weight: 0
    fallback_codes:
      - 429
      - 503
  - name: gpt-4
    provider: openai
    suffix: /chat/completions
    virtual_secret_key: ""
The first object in the models array is the primary model, and the second is the fallback model.
Route URL
Each custom route has a fixed URL like:
https://api-dev.javelin.live/v1/query/gpt-35-route
Use this in your API client or codebase.
Sample Custom Route Request
curl 'https://api-dev.javelin.live/v1/query/gpt-35-route' \
  -H 'accept: application/json, text/plain, */*' \
  -H 'content-type: application/json' \
  -H 'x-javelin-Apikey: $JAVELIN_API_KEY' \
  --data-raw '{
    "max_tokens":100,
    "messages":[
      {"content":"You are a helpful assistant.","role":"system"},
      {"content":"What is artificial intelligence?","role":"user"}
    ],
    "temperature":0.7
  }'
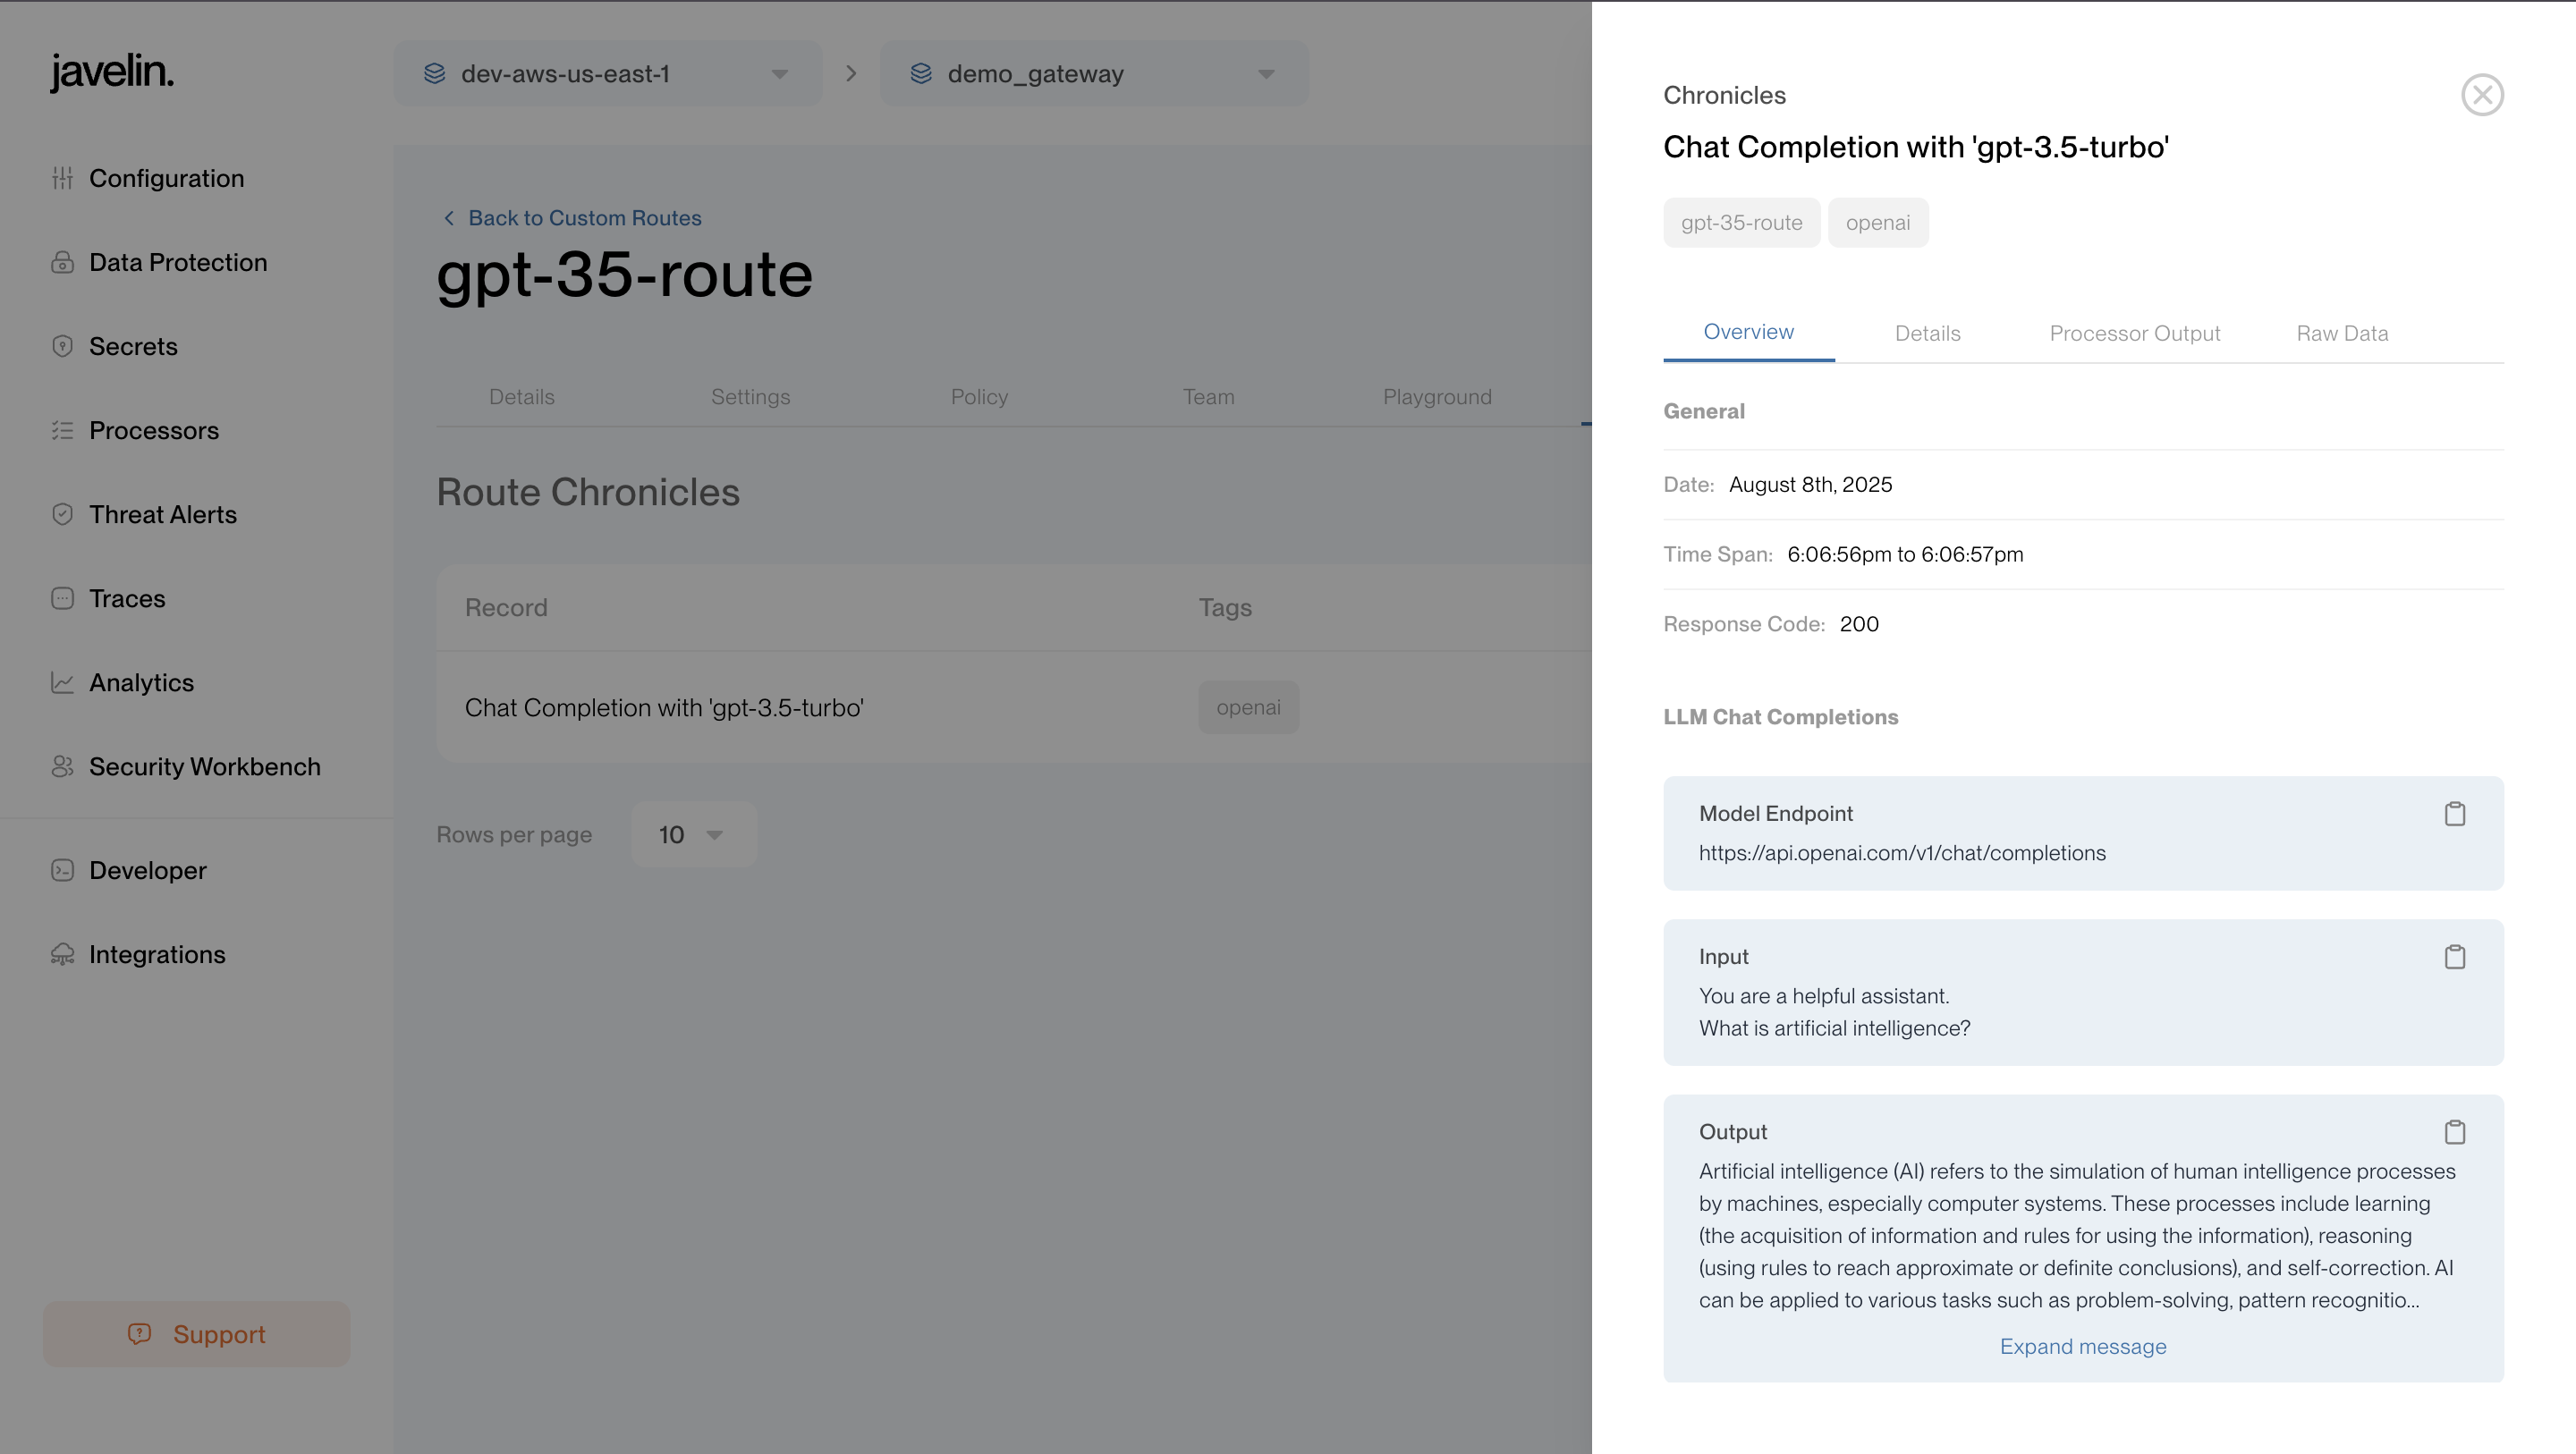
Once executed, open Chronicles to view:
- Model Input and Output: See the full message history sent to the LLM and the generated response.
- Guardrails Data: Understand which guardrails were triggered (e.g., DLP, prompt Injection, security filters, etc).
- Raw JSON Logs: Inspect the complete raw request and response payloads.
Summary
| Feature | Unified Route | Custom Route |
|---|---|---|
| System Generated | ✅ | ❌ |
| Requires Setup | ❌ | ✅ |
| Playground Support | ❌ | ✅ |
| Flexible Format | Dynamic | Limited to a Model |
| Ideal For | Fast integration, multiple models | Deep customization, enterprise workflows |
| Chronicles Support | ✅ | ✅ |